Organizing a Small Home Workshop
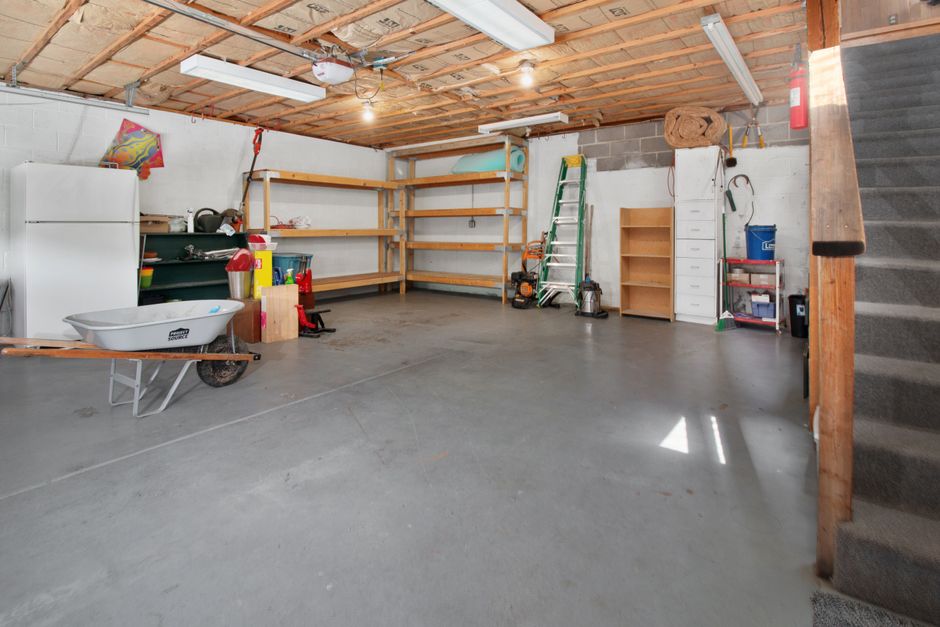
Organizing a small home workshop in a garage or compact space requires careful planning and thoughtful execution. Whether you are an experienced woodworker or a hobbyist just starting out, the challenge of maximizing a limited area while maintaining safety and efficiency is common. The goal is to create a functional environment where tools are accessible, materials are stored properly, and dust is managed effectively. This article explores practical storage solutions, tool layout strategies, and dust control methods that can help transform a cramped space into a workable workshop.
Many woodworkers face the reality of sharing their workspace with vehicles, lawn equipment, or general household storage. This dual-purpose nature demands creative approaches to organization that allow for quick transitions between activities. By focusing on vertical storage, mobile bases, and strategic zoning, you can make the most of every square foot. Additionally, understanding the importance of dust control and air quality is crucial for both your health and the longevity of your tools. The following sections provide detailed guidance on these aspects, drawing on established practices and adaptable principles.
Assessing Your Space and Needs
Before purchasing storage units or building workbenches, take time to evaluate your available space and identify your specific woodworking needs. Measure the dimensions of your garage or workshop area, noting ceiling height, door clearances, and any obstructions such as water heaters or electrical panels. Consider the types of projects you typically undertake and the tools you use most frequently. This assessment will inform decisions about layout and storage priorities.
Create a list of your stationary tools, portable power tools, hand tools, and materials. Group them by frequency of use and function. For example, tools used daily should be within easy reach, while occasional tools can be stored higher or in less accessible locations. Also, think about the workflow: how materials enter the space, where they are cut, assembled, and finished. A logical flow reduces unnecessary movement and improves efficiency. Keep in mind that your needs may evolve, so design with flexibility in mind.
Safety should be a primary consideration during this assessment. Identify potential hazards such as poor lighting, inadequate ventilation, or cluttered walkways. Ensure that electrical outlets are sufficient and properly grounded. If you share the space with vehicles, establish clear boundaries and consider using retractable cords or hose reels to keep the floor clear. Remember that a well-organized workshop is not just about convenience; it also minimizes the risk of accidents and injuries.
Storage Solutions for Compact Spaces
In a small workshop, vertical space is your greatest asset. Utilize wall space by installing sturdy shelves, pegboards, and wall-mounted cabinets. Pegboards are particularly versatile for hanging hand tools, clamps, and small power tools, keeping them visible and accessible. Adjustable shelving systems allow you to reconfigure storage as your collection grows or changes. For heavier items, such as lumber or large machines, consider ceiling-mounted racks or wall brackets that can support significant weight.
Another effective strategy is to incorporate mobile bases for large tools. By mounting table saws, band saws, planers, and workbenches on wheels with locking casters, you can move them out of the way when not in use. This transforms a static layout into a dynamic one, enabling you to reconfigure the space for different tasks. When selecting mobile bases, ensure they are rated for the weight of the tool and feature reliable locking mechanisms to prevent movement during operation.
Under-bench storage is often overlooked but can be maximized with drawers, pull-out trays, and bins. Custom-built drawers that fit beneath your workbench can hold hand tools, fasteners, and small accessories. Clear plastic bins with labels make it easy to identify contents without opening them. For lumber and sheet goods, a dedicated rack that keeps materials off the floor protects them from moisture and pests while freeing up floor space. Consider a vertical rack for sheet goods and a horizontal rack for long boards.
Finally, don’t forget the ceiling. Overhead storage racks or hoists can store ladders, extension cords, and seasonal items. However, ensure that such storage does not interfere with lighting or ventilation. Always use appropriate hardware and anchorages to prevent falls. By combining these storage solutions, you can create a place for everything and keep your workspace clutter-free.
Tool Layout and Workflow Optimization
The layout of your tools directly impacts your efficiency and safety. Start by identifying the core work zones: a cutting area, an assembly area, and a finishing area. Ideally, these zones should be arranged in a logical sequence that matches your workflow. For instance, place the table saw near the lumber storage and the assembly table, so you can easily move cut pieces to the next stage. Keep frequently used tools within arm’s reach of their respective zones.
Consider the concept of a triangular workflow, where the three main workstations (saw, bench, and assembly) form a triangle that minimizes walking distance. This principle, often used in kitchen design, can be adapted to workshops. Ensure that there is adequate clearance around each machine for safe operation and material handling. The rule of thumb is to allow at least three feet of space around all sides of a table saw to accommodate long boards.
For small power tools, a tool wall or cabinet with dedicated spots can reduce clutter. Use shadow boards or labeled hooks to ensure that each tool has a home. This not only makes it easy to find tools but also encourages you to put them back after use. Portable tools can be stored in rolling cabinets that can be moved to the work area when needed. Battery charging stations should be centrally located and well-ventilated.
Lighting is a critical aspect of tool layout. Good general lighting combined with task lighting at each workstation reduces eye strain and improves accuracy. LED shop lights are energy-efficient and can be mounted on walls or ceilings. Avoid placing lights directly above your line of sight to prevent glare. Additionally, consider the placement of electrical outlets to minimize the use of extension cords, which can be trip hazards.
Dust Control Strategies
Woodworking generates dust, which poses health risks and can damage tools. Implementing effective dust control is essential in a small workshop. The first line of defense is capture at the source. Use a dust collector or shop vacuum connected to your power tools, especially those that produce fine dust such as table saws, routers, and sanders. Look for tools with built-in dust ports and use adapters to connect them to your collection system.
A central dust collection system with ductwork can be efficient but may be overkill for a small shop. Portable dust collectors on mobile bases offer flexibility and can be moved to the tool in use. Ensure that the collector has sufficient airflow (CFM) for the tools you connect. For fine dust that escapes capture, an air filtration unit can help clean the air. These units circulate the air and trap particles down to one micron. Place the unit near the ceiling and run it for a period after you finish working to clear lingering dust.
Personal protective equipment (PPE) is also important. Wear a dust mask or respirator, especially when sanding or working with exotic woods that can cause allergic reactions. Safety glasses and hearing protection are also recommended. Establish a regular cleaning routine to remove dust from surfaces. Use a vacuum with a HEPA filter rather than compressed air, which merely redistributes dust. Wet wiping or using a damp cloth can also help settle fine particles.
Consider the layout of your dust collection system to minimize hose runs and obstructions. Keep hoses and cords off the floor using overhead supports or retractable reels. This not only improves safety but also makes it easier to move around the shop. Regularly inspect and clean your dust collection system to ensure it operates efficiently. Clogged filters or ducts reduce suction and can lead to dust buildup.
Maintenance and Adaptability
An organized workshop requires ongoing maintenance. Schedule regular times to declutter, sharpen tools, and restock consumables. A few minutes of tidying at the end of each session can prevent mess from accumulating. Periodically review your storage and layout to see if they still meet your needs. As you acquire new tools or take on different projects, you may need to adjust your setup.
Flexibility is key in a small space. Use modular storage systems that can be reconfigured. For example, stackable bins, adjustable shelving, and mobile cabinets allow you to adapt quickly. If you share the garage with vehicles, establish a routine for moving cars out and setting up your workspace. Consider using a fold-down workbench or a wall-mounted table that can be stowed away when not in use.
Safety should be revisited regularly. Check that fire extinguishers are accessible and in working order. Ensure that your first aid kit is stocked. Keep walkways clear of debris and cords. Review your dust collection and ventilation to ensure they are functioning properly. By maintaining a safe and organized environment, you can enjoy your woodworking hobby with peace of mind.
In conclusion, organizing a small home workshop is a continuous process that combines thoughtful planning, smart storage solutions, efficient tool layout, and diligent dust control. By assessing your space, utilizing vertical storage, optimizing workflow, and implementing dust management strategies, you can create a functional and safe workspace. Remember that the goal is to support your woodworking activities while making the most of your available area. With these principles in mind, even a compact garage can become a productive and enjoyable workshop.